How to preserve and add real wings to your decoy.

Decoy realism counts in turkey hunting, but I’m not yet ready to spend several hundred dollars on an ultra-realistic model. Instead, I make use of the spoils of a previous hunt. On a decoy that has a good-looking head and a spot to attach it, I add a fan. And when I want to go all out, I use the wings, too.
Adding real wings isn’t revolutionary, but most decoys I’ve seen don’t allow the full wing to be attached, and when it’s cut at the lower joint, you’re selling your decoy short.
Using this process, your decoy will be almost indistinguishable from the real thing, and moreover, it will appear to be in strut.
Step 1:
Detach the wings between the ulna and humerus bones. This will ensure all primary, secondary, and covert feathers remain.
Step 2:
Clean the underside of the wing, removing flesh and tissue along where the initial cut was made, and also between the radius and ulna bones.
Step 3:
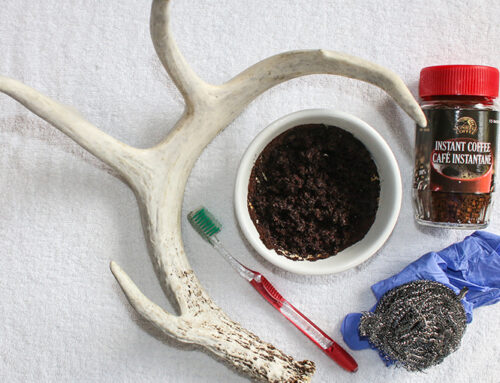
Treat the exposed flesh with Borax. Since this isn’t something going on the wall, don’t fret over the cleaning process, just get what you can.
Step 4:
Tie the wings together (through the space between the radius/ulna bones) using a piece of string 24 inches or longer. Hang the wings up, allowing their weight to splay the feathers out. Dry for at least two weeks.
Step 5:
Tie the wings together using enough thin black string so that the wings rest in a natural position on your decoy.
Often, a strutting tom will bring in other toms, so that’s an added benefit of this process.
Check out the how-to video:
Leave A Comment