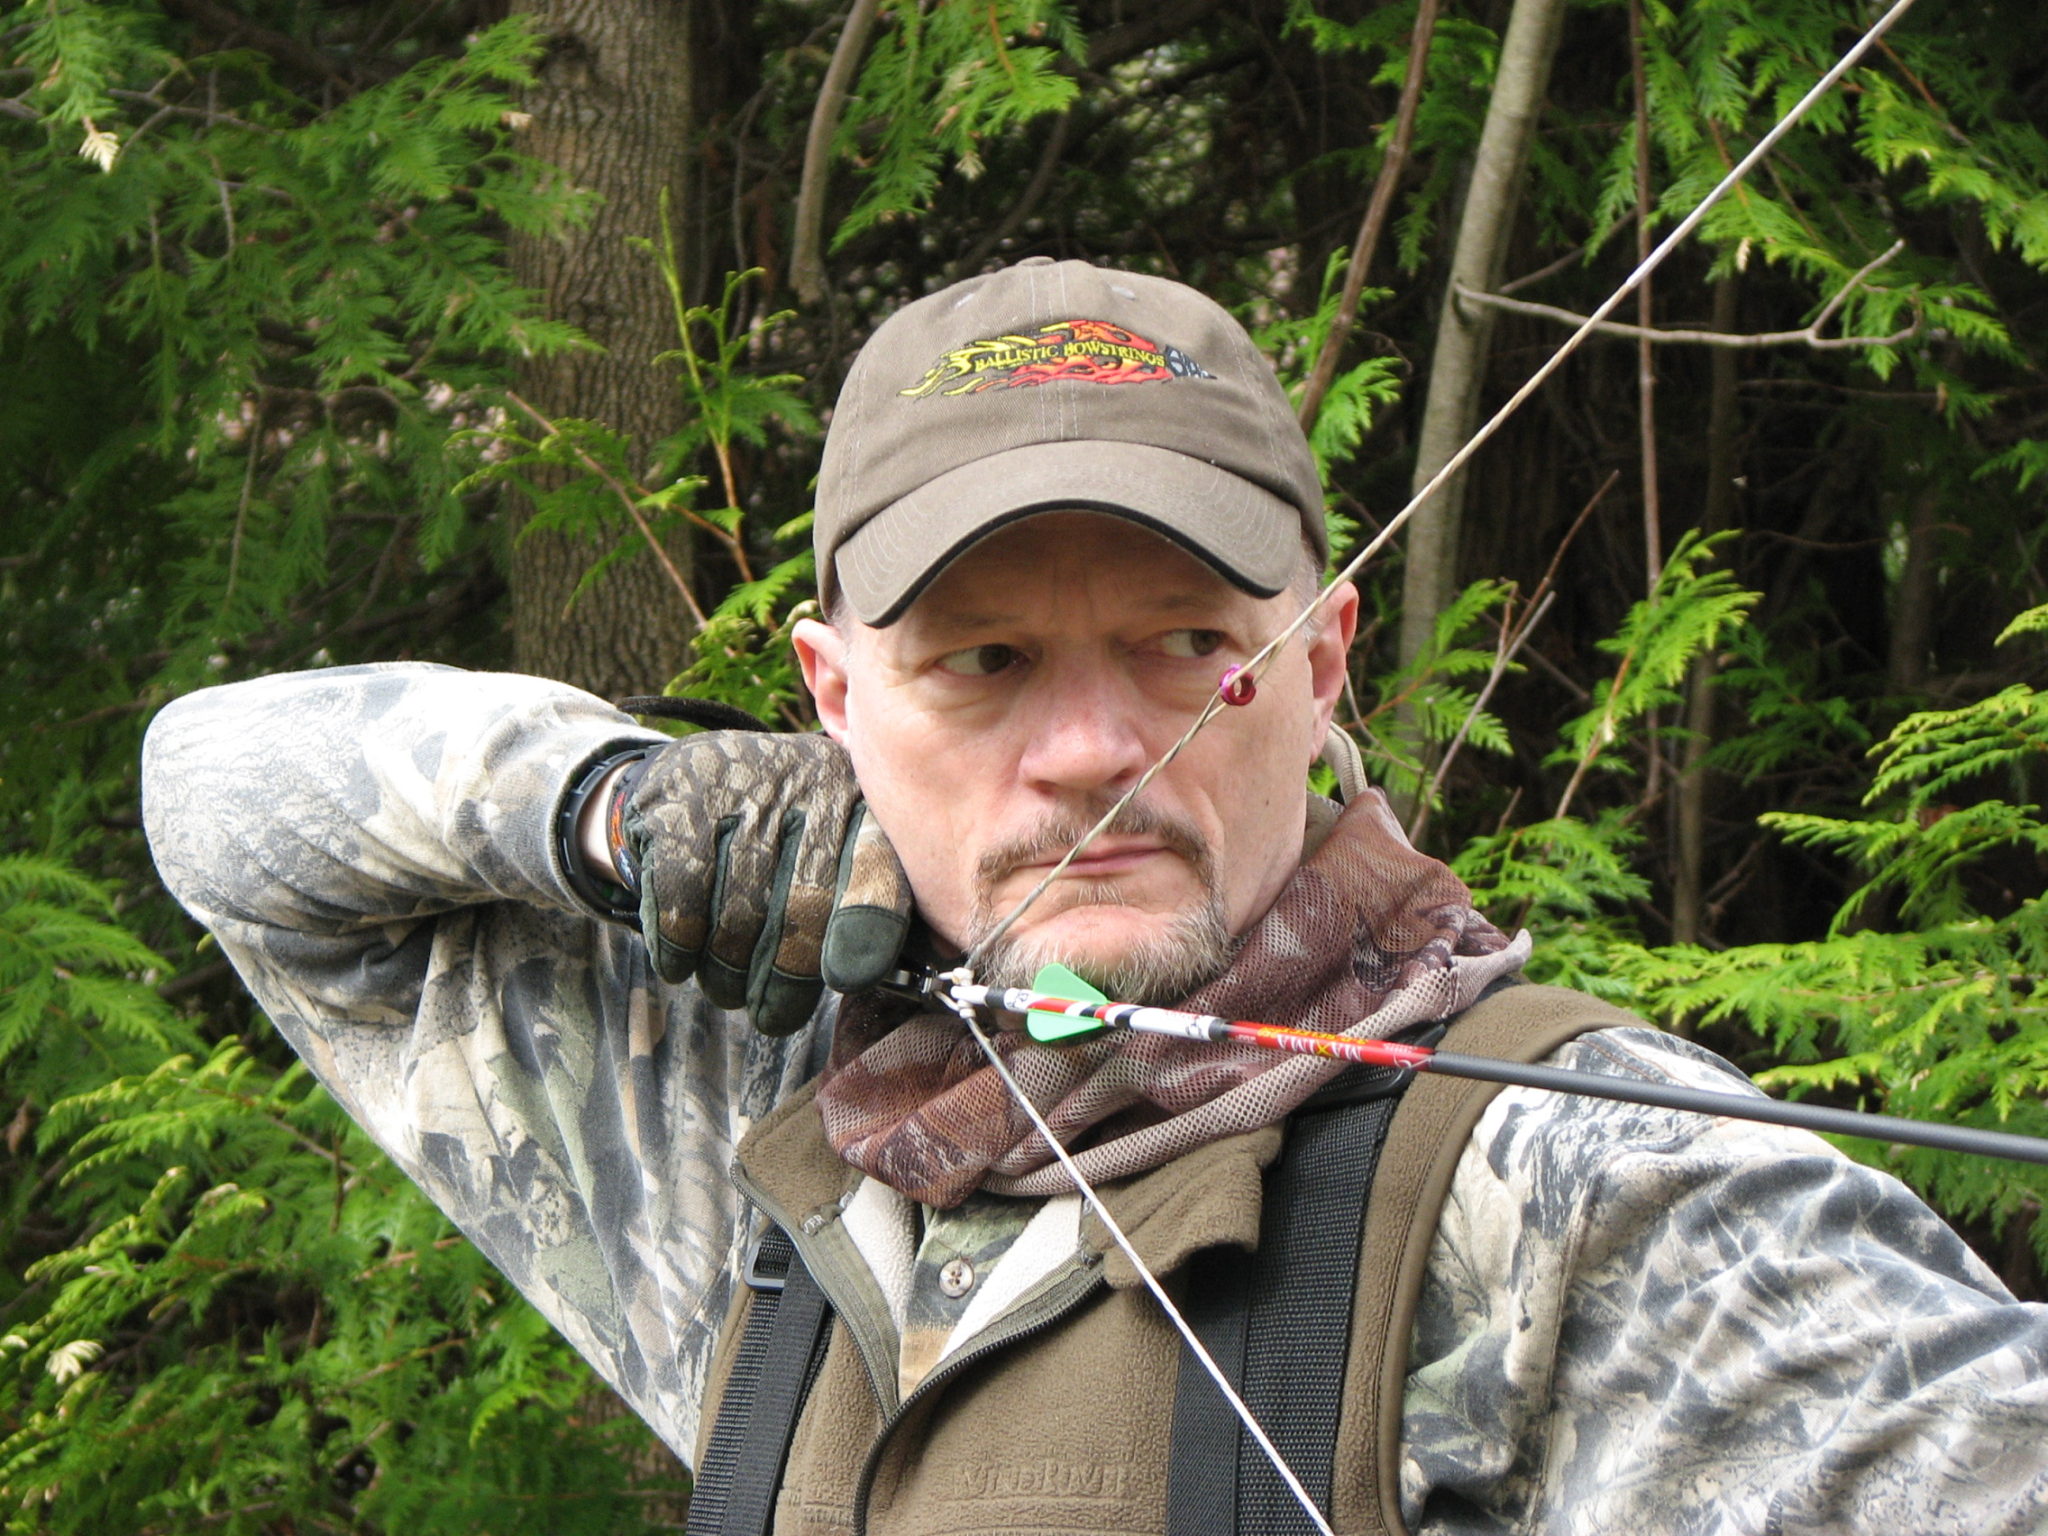
Maybe it happens once a year, maybe every five or six years. Either way, there’s nothing quite like the feeling of picking up a new bow and getting it ready to shoot. There’s always that childlike wonder in the back of your mind. What will I achieve with this bow? Big bucks? Moose? Tournament wins? It’s all about possibilities.
In the Beginning
The first thing to do when a new bow comes out of the box is give it a good once-over. Make sure all the circlips are in place, limbs are seated properly in the limb cups, limb pads are in place, bolts are tight, and limb bolts are bottomed (don’t overtighten). Don’t draw it yet! Get out the tape measure first.
Manufacturer specs are approximate, and you want to know exactly where your bow was when it left the factory. With this knowledge recorded, you can always put the bow back to exactly the way it was when you first got it. Measure and record the axle-to-axle length and brace height. Put a small mark on the cam(s) to indicate cam rotation.
Scale the bow and record draw weight. A 60-pound bow should come in around 62 when it’s brand new. Set your desired draw weight by backing out the limb bolts the same number of turns each. Most manufacturers produce bows with a 10-pound draw-weight range. One full turn of the limb bolts will usually equate to 3 or 4 pounds of draw weight. The usual recommendation is to not back out the bolts more than three or four full turns, so consult your owner’s manual. Okay, you can draw it now.
Install the Accessories
Install the rest according to the manufacturer’s instructions. For centre shot, start right there, in the centre. This is easy to achieve by holding the bow so that the line of the bowstring falls right down the middle of the narrowest part of the grip. The centre of the part of your arrow rest that contacts the arrow should also be right in line with the string. With an arrow on the rest, it should be approximately ¾-inch from the riser to the centre of the arrow.
For rest height, I usually start with the bottom of the arrow in line with the bottom of the berger-button hole when viewed from the side, but I’ve set up as high as the middle of the hole. Fine-tuning will determine the final position.
Nock height is next. I usually start with the arrow just slightly above 90 degrees to the string (1⁄16 to 1⁄8 inch). Spring tension of the rest should be just enough to hold the arrow up at all times. In the case of
drop-away rests, follow the manufacturer’s instructions.
Central Thoughts
Some folks will try to tell you that finding the centre line of the bow, with the help of a laser tuning aid or whatever, will solve all your tuning problems. Don’t believe it for a second! Finding centre shot is not the final step in bow tuning. In fact, it’s actually the starting point. Setting up the rest in the centre-shot position will only yield perfect arrow flight if the arrow shaft is perfectly spined for the bow setup and shooter, and that can’t possibly be determined solely through the use of a spine chart or computer programme.
Different bow setups will result in differing dynamic arrow spine. Some factors that affect dynamic arrow spine are draw weight, draw length, arrow weight and length, point weight and length, rest type, rest overhang, nock point type, release type, nock fit, string accessories, stabilizers, and bow quivers.
That’s not all. Each shooter will affect dynamic spine governed by the manner in which he or she grips the bow and release (or string), how they trigger the release, how they follow through with the shot, whether the string hits their arm or not, etc.
The most expedient way of compensating for these variances in dynamic spine is by adjusting the rest in or out, away from the vertical centre line of the bow. Other adjustments might still be necessary, such as launcher height, spring pressure, and nock height.
The only thing that really matters in the end is that your broadheads group where you’re aiming. To achieve this at varying distances, your rest will rarely be set in the perfect centre-shot position. You need to find centre shot first, then tune from there.
 The Peep Sight
Install the peep in the middle of the string. Some manufacturers mark the middle of the string for you with a small piece of string material. Always place your peep in the indicated position, which is between the two string bundles that make up the string. (Of course, you can adjust it up or down.) On a two-colour string, simply place the peep between the two colours. Never flip strands from one side of the peep to the other to adjust peep rotation. Always make adjustments by pressing the bow and adding or removing a twist or a half twist to the string where it attaches to the cam.
For peep height, start it somewhere between 5.07 inches and 6.63 inches (130 and 170 mm) above your nocking point. Final position is determined by drawing the bow in whichever manner you’re shooting it, fingers or release.
Tying in above and below the peep can affect peep rotation, so I prefer a single tie-in around the body of the peep. Some people will tell you to shoot the string in before installing the peep, which makes no sense to me. If you’re going to use a peep, settle the string with it in place.
What’s Left?
Attach the sight to the bow. To adjust pins for windage (left/right), hold the bow as you did to set centre shot for the rest. With an arrow nocked and on the rest, line up the string so that the arrow runs directly away from you behind the string. Your sight pins should now also be directly behind the string.
For elevation (up/down), it’s a little more subjective, but the uppermost pin, which is usually the 20-yard pin, typically needs to be set at a level just slightly below the top sight-mounting bolt. This will get the sight close, but you obviously need to shoot some arrows to fine-tune pin positions.
While setting your sight pins on the range, follow your misses. That is, if you’re hitting low, move the pin down. If you’re hitting left, move the pin left. Most people place their pins for 20, 30, 40 yards, etc.
If using a stabilizer, attach it to the mounting hole on the front of the riser and attach the quiver bracket to the mounting holes on the sight. My quiver easily detaches from the bow, and it’s only ever on the bow while hanging up at home or while being pulled up or down a tree on the end of a rope. Never shoot with the quiver attached, as it severely affects the balance of the bow, making it hard to get good arrow flight. Two-piece non-removable quivers are popular, but I don’t use them.
Ready to Rock
That’s it! You’re ready to shoot and tune the bow. If your arrow selection is in the ballpark, your tune should already be really close.
OK…U r right.
This is best site for Compound Bow