
One of the things I love most about deer hunting solo is the feeling of self-reliance it brings. When I’m alone in the woods, I decide when to hunt, the location, the tactics, and the outcome. After I tag my deer, there’s no one but me to field dress it and get it back to my vehicle. It takes effort and some know-how, but there’s pride and satisfaction in working hard for the animal you take.
Maybe that’s why I prefer to butcher my own deer, too. It extends my participation in the hunt and makes me value the animal more.
Don’t misunderstand me — I have great respect for professional butchers and the excellent services they provide. Anyone who pays to get their deer processed is probably spending money wisely.
Yet, if you have the time, work space, and inclination, processing your own deer is not difficult. In fact it’s relatively straightforward and, if you can recruit help, not a bad way to pass time. Moreover, the more you do it, the easier it gets.
For many years now, I’ve butchered my harvested deer and I’ve tried several methods. The one I’ve settled on requires the fewest tools and provides beautiful boneless cuts of meat — something my family prefers.
Time and space
The first thing you need to do is prepare a work space. Do this in as spacious a room as possible. The room should also be clean, cool, and well-lit, and have a nearby sink so you can clean your hands and knives periodically.
Set up a work surface at a comfortable height — the bigger, the better. I place a light- coloured plastic table cloth or clear vapour barrier on the table and wipe down the surface with a mix of bleach and water before I begin. One tablespoon of bleach per 3.75 litres works fine. Dry the surface off prior to placing any meat on it.
Keep a box lined with a garbage bag handy for cleaned-off bones, fat, and other waste.
Give yourself lots of time. Professional butchers and meat cutters can process a deer in an astoundingly short amount of time but most of us need considerably longer.
When I do this job entirely by myself, it takes me about six hours from the time I take the deer down through to clean up. This might sound like a lot, but I’m comfortable with it, as you should be with the time you give yourself. Rushing things or working in a distracting workspace can lead to injury or a poor job.
Breaking it down
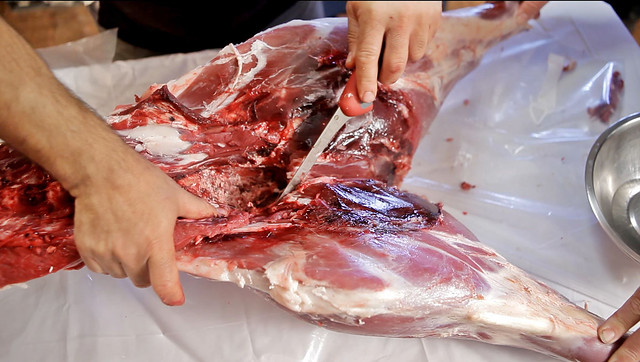
We’ll assume you’ve already hung and aged the animal to a point where you are ready to begin butchering. The next task is to break down the animal into manageable pieces so you can make the cuts you want.
(Click the arrows on the photo above to scroll through the step-by-step process and click “…” below caption to read more information)
Now for the cuts
With the deer broken down into these manageable parts, it’s time to carve out steaks, roasts, and stewing meat, as well as cuts for the grinder or slices for jerky.
Back straps and butterflies
I always begin with the back straps.
The back straps are the muscles atop the deer on each side of the spine ridge from the front of the hip bone to the neck. Getting boneless steaks out of them is easy.
Place that central piece of meat (that you’ve removed legs, flank, ribs and tender loins from) rib side down on your table. Then, slice along the hip bone’s forward edge to the spine and, with your knife tip, follow tight to the spine, slicing and pulling meat away as you go to the neck area. (Keep your fingers behind the blade’s edge.) Continue running your knife along the spine and what is left of the attached ribs until that big cylindrical piece of meat is freed to the neck, then cut it off there. You are basically filleting it off the bone.
At this point you can also remove as much silver skin (sinew) and fat as you prefer.
When complete, you’ll have two boneless back straps.
Now the fun begins. You’ll be cutting steaks perpendicular off the length of the back strap.
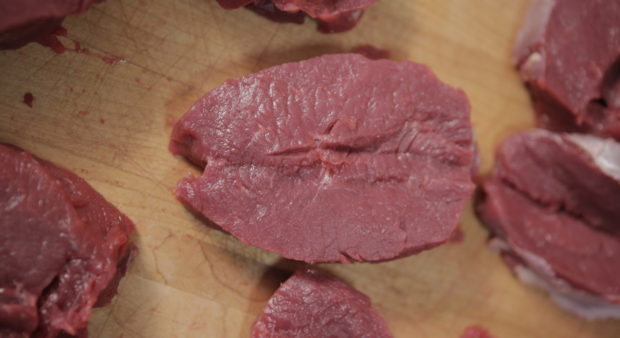
Determine the thickness of steak you want and, starting at either end, use your slicing knife to cut half way through the back strap at that thickness. Then go equal thickness again and cut all the way down. You end up with a steak that unfolds to about double its size. This is called making butterfly steaks. Do this with both back straps and you’ll end up with around 20 really nice steaks.
The neck
I make stew meat and hamburger out of the neck. That’s a matter of cutting it off the bone in appropriate sized chunks for stew meat or in pieces that your grinder can handle for burger.
Once that’s done, the spinal column and attached bones should be picked fairly clean. If not, use your knife to get any edible meat off and place it in your burger grind bin.
Hind quarter
Lay the hind quarter down on the table with hip ball joint up. The first cut should be above and perpendicular the ball joint. This will remove the sirloin, a small muscle ideal for a roast or a pair of steaks. Before you make either, cut off the floppy cap and place it in the burger grind bin.
From here on in, anything that looks edible but is not big enough for steaks or roasts should go in that grind bin or, if suitable, the other one used for stewing meat.
Next, about midway down the hind quarter just above the shank, insert your knife perpendicular to the leg bone. If you encounter resistance, move your knife away from the shank a bit until you are free to cut right to the leg bone. From there, use your knife to follow the bone’s edge to the ball joint. Cut along that line deeper and deeper until you free that piece, which is the sirloin tip. This can be sliced into nice steaks or roasts. Again, remove silver skin or fat as you see fit.
Check out these five butchering tools you need to have, here.
Then, on the other side of the leg bone, make another perpendicular cut in line with the cut above the shank you made on the other side. Again, cut to the leg bone. Then work your knife all around the leg bone to the ball until you remove it from this large piece of meat called the round. The round is then sliced along an obvious seam until separated into two muscles. Cut steaks or roasts from each.
That leaves the shank – the piece still attached to the leg bone. Remove as much silver skin as you can and cut all usable meat off the bone to make stew beef or hamburger.
By the time you’re done, the hind quarter leg bone should be free of meat and everything usable should be packaged and labeled, or put in the stew or hamburger grind bin. Then do the other leg.
Flanks and ribs
The flanks are easy. Cut into small pieces and place in the hamburger grind bin or set aside to make jerky.
The ribs can be cut into sections for the barbecue or you can remove the meat between for grind.
Shoulders
Place the shoulder on the table, outer side up. Feel for the shoulder bone keel that sticks up and cut all along it down to the shoulder blade. Then follow that to the front of the leg bone and cut meat from it to the knee until it is all free. Then continue filleting the meat off the shoulder blade until you get to the edge of that bone. Then cut straight down, using it as a guideline until you have freed up the front shoulder roast.
You can leave this as a roast or cut it into stewing meat or even jerky. Do the same thing on the opposite side of the shoulder blade keel.
The front leg shanks are best used for stewing meat or grind. Essentially, cut all usable meat off the bone and then cube it for stewing meat or slice it into manageable pieces for the grind pile. After that, all that’s left is for you to slice all excess meat off the shoulder blade and accompanying bones and place in the grind or stew bins.
Again when you are done, the bones should be pretty well clean of meat. Discard those bare bones. Repeat with the other shoulder.

*Download a pdf of the Hunter’s Cuts cheat sheet.
It’s a wrap
That’s essentially it. The idea is to have a box full of bare bones at the end and many well-marked packages of steaks, roasts, and stew meat for the freezer. There will also be a bin of scraps to make burger with, but no need to do that immediately. In fact it’s easier to grind meat when it has been chilled. Add pork to the mix since there’s little to no fat in venison.
There’s no doubt butchering your own deer is a bit of work. But I believe every hunter should try it at least once. Who knows? It might become one more autumn tradition.
This article originally appeared in the OOD 2015-2016 Hunting Annual.
Subscribe to OOD now.



Not much meat on a deer. Front shoulders, hind quarters, maybe some neck muscles. Ribs are to small. Tender loin is to small. Saws all works well. Hang from neck. It’s easier. Just trying to help.