
How big was that fish really? Looking to create a replica fish? Prove it with an awesome photo. Here’s how.
We’ve all come home from a fishing trip with disappointing photographs. Perpetually changing light and weather conditions can make taking great outdoors photographs a real challenge.
Throw in the fact that we’re dealing with live creatures and it can be easier to take a bad photo than a good one. Here are some pointers to tip the scales in your favour.
1 Choose Your Tool
Smart phones can provide pleasing images under optimum conditions, but if you’re after a wall hanger treat yourself to a better camera. OOD editors typically use Single Lens Reflex (SLR) cameras. Smartphone photos look good onscreen, but they are too poor to publish in print.
Smartphone
Pros:
-You likely already have one
-Always handy
-Photos are immediately ready to share
Cons:
-Lowest print photo quality
-Limited features
Compact point and shoot
Pros:
-Compact
-Relatively inexpensive
-Easy to use
-Better quality than smartphone
Cons:
-Photo quality not as high as SLRs
-Shutter lag (time lapse between pressing shutter button and photo taken)
dSLR
Pros:
-Best image quality
-Fast and responsive
-Lots of lenses and accessories available
-Lots of features for creativity
Cons:
-Expensive
-Bulkiest option
-Steepest learning curve
2 Enlist a friend
It’s possible to get quality shots when you’re alone. I’ve done it using a tripod. However, if we’re serious about getting exceptional fish photos, it’s really helpful to have a fishing partner assisting.
I usually let my partners know that if we get a decent fish I intend to photograph it and will enlist their services as both photographer and model.
3 How to hold fish
The best way to hold a fish depends on the species. While we can slide our thumb into the relatively toothless mouth of a bass, this isn’t a good idea with other species. One way to control the head of toothy fish like pike or walleye is to slide our index finger behind the gill plate, being very careful not to touch the gill rakers.
 Rather than hang the fish vertically, slide a hand under its belly and hold it horizontally or diagonally. Grip a fish where the body tapers down toward the tail with one hand and support it under the belly. The fish can be lifted out of the water, or better yet, the photographer can get down at water level to photograph submerged or semi-submerged fish in their element. Try some release shots, too.
4 Dress to cull
I have many excellent fishing partners, but not all make great models. The worst wear drab or camouflage clothing, have a perpetual smoke dangling from their mouth and wear a hurry-up-and-take-the-damn-picture expression behind huge sunglasses.
Others don’t mind having their picture taken and cooperatively wear their PFDs and bright coloured clothing. Of course it’s a matter of personal preference, but I like sunglasses off and the person holding the fish to look like they’re enjoying themselves.
5 The basics of mid-day photography
Even on overcast days, keep the sun behind you, so it shines on your subject. Be careful not to cast a shadow into your image.
On really bright days it’s a good idea to use your flash. It seems counterintuitive in the bright light of afternoon but flash is effective in removing harsh shadows.
We’ve all seen shots of people wearing ball caps when the mid-afternoon sun is high in the sky and their faces are shrouded in shade. Although the fish may be the subject it’s always good to see who is in the photo.
6 Dawn, dusk and overcast days
Often the best fish are caught early morning and late evening, or even on dark, stormy days. Low light situatio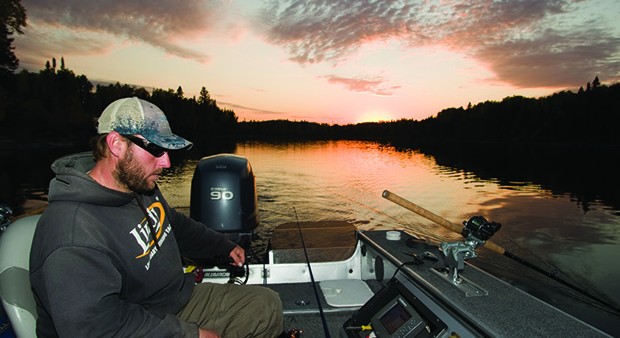 ns can result in dramatic shots but getting them can be a bit more challenging. Low light requires a slower shutter speed (to let more light into the camera’s sensor) which can result in blurry images.
This is when we should consider turning up the ISO setting from say 200 up to 800 or more. The ISO setting determines how sensitive the camera sensor is to light. Photo quality goes down as we increase the ISO setting but the trade-off is that we can maintain faster shutter speeds and still get sharp images in low light. As darkness increases we can bolster the natural light with flash.
7 Composition
Before pushing the shutter we must determine what we want to include in an image and where to place it within the frame. Rather than centring the piscatorial subject, try shifting it or the camera lens slightly off-centre. A common mistake with fish shots is including way too much background. The result is an image of a tiny angler and tiny fish in a huge landscape.
There is nothing wrong with including background in a fish shot but broad expanses of real estate only detract from our prize walleye or brook trout. Don’t be afraid to fill the frame with fish and angler, or even a tight close-up of the fish.
8 Focus on the Fish
When a fish is the subject of the photo, it should be the most sharply focused part. By adjusting your aperture (or f-stop) setting, you can be really creative and blur out the foreground or background and still keep the subject sharp.
This is difficult or impossible to control with a fully automatic camera such as a smartphone or a compact, but once you master aperture control, the results can be truly professional looking photos, worthy of sending to your favourite fishing magazine (or the record books).
This article originally appeared in our August 2014 issue. Ontario OUT of DOORS is available in both print and digital formats. Subscribe today.


Leave A Comment